How to Book an Appointment
A step-by-step guide to booking a visit at Inkuru Nziza Orthopedic Specialized Hospital online — no account needed. It takes about three minutes.
How a patient books an appointment
Booking takes three short steps: Personal Info → Appointment Details → Review & Confirm. You don’t need an account. After you book, the hospital confirms your appointment by email and SMS.
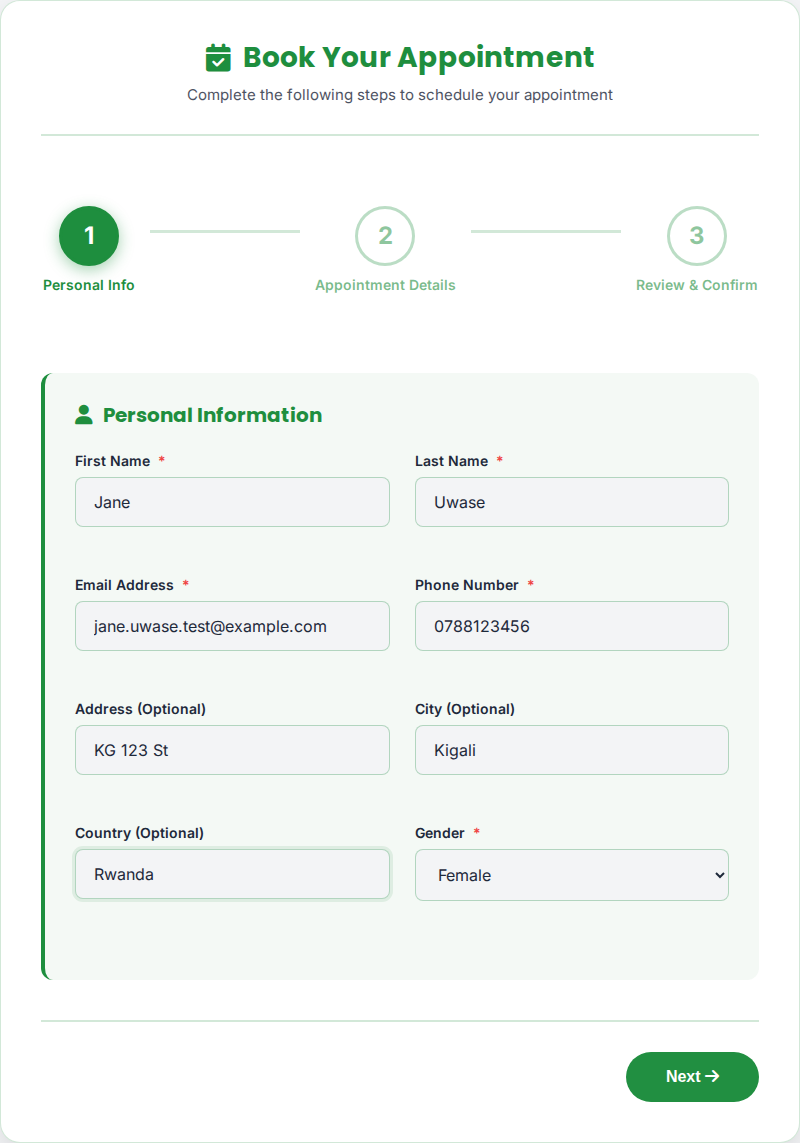
Visiting /appointment shows Step 1 of 3 straight away — no login required, since this form is for the public. Six fields are required: first name, last name, email, phone, and gender; address, city and country are optional context for the front desk.
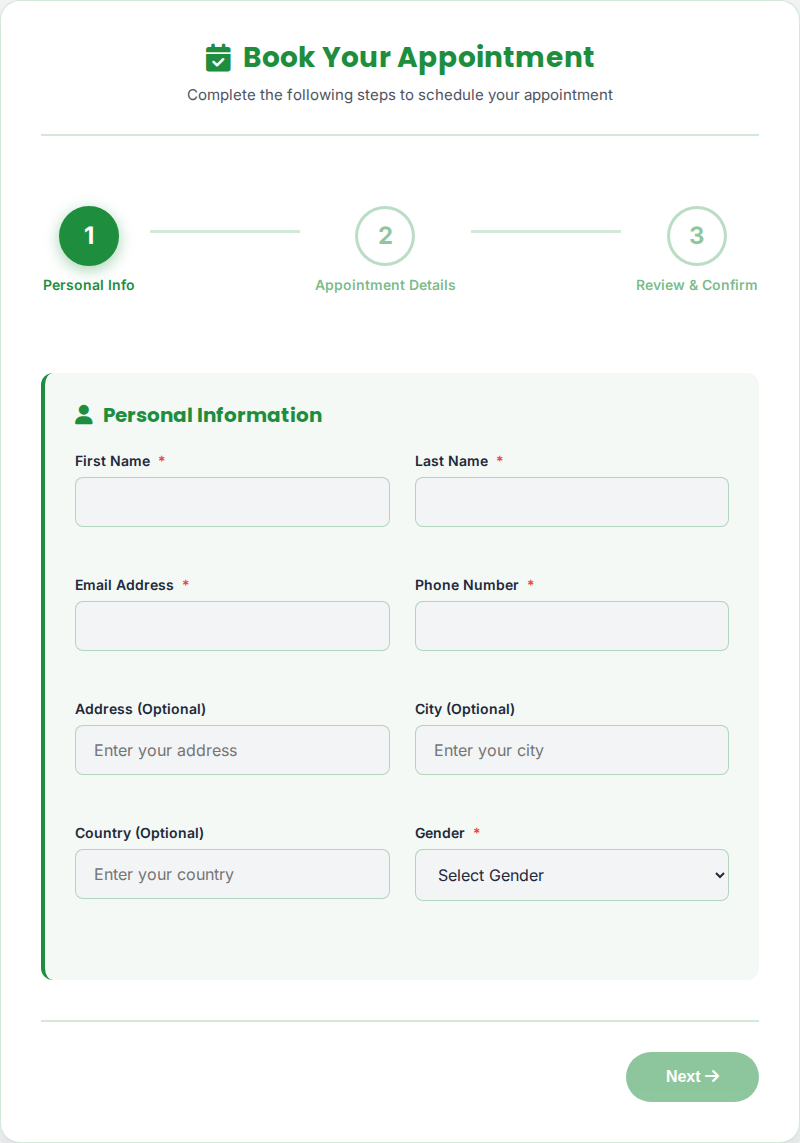
The "Next" button stays disabled until every required field has a value — there's no way to skip ahead with missing contact details. Once complete, it lights up.
firstName·lastName·email·phone·gender— requiredaddress·city·country— optional
Every active service from the hospital's service catalogue shows as a card, grouped by which department runs it. Clicking a card is the only way to set the hidden service field the form actually submits.
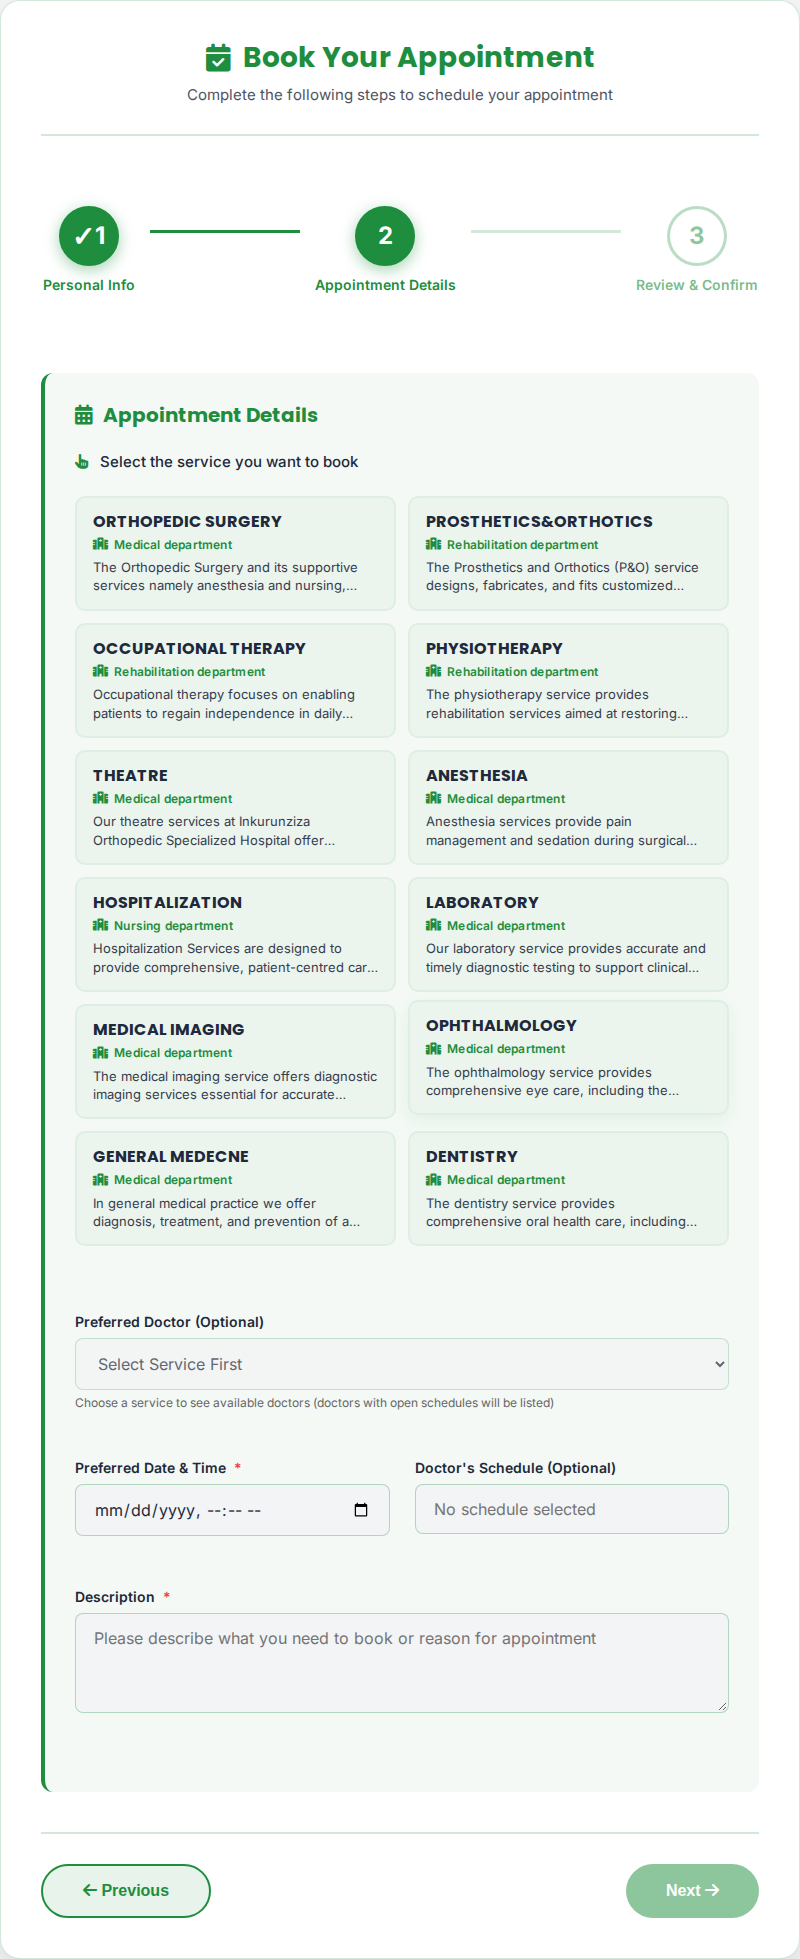
Picking "Orthopedic Surgery" marks the card active, shows which department it belongs to, and fires a background request to /bookingschedule/getDoctorsByDepartmentFromSchedule to populate the doctor dropdown with only doctors from that department.
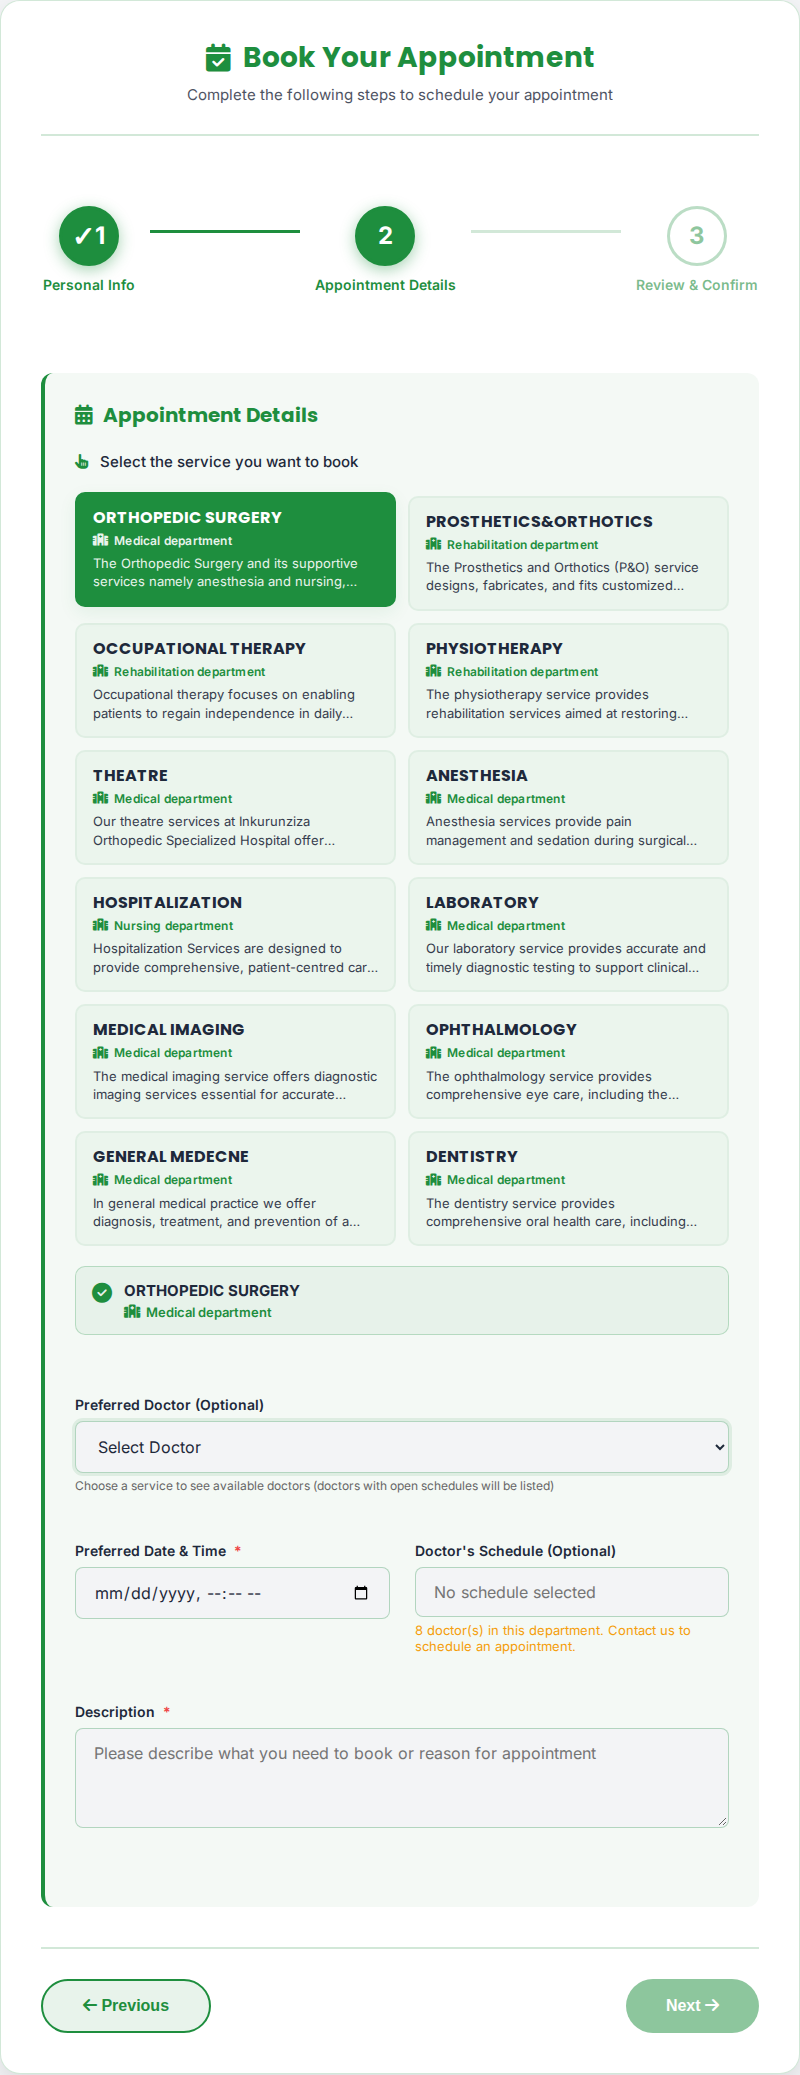
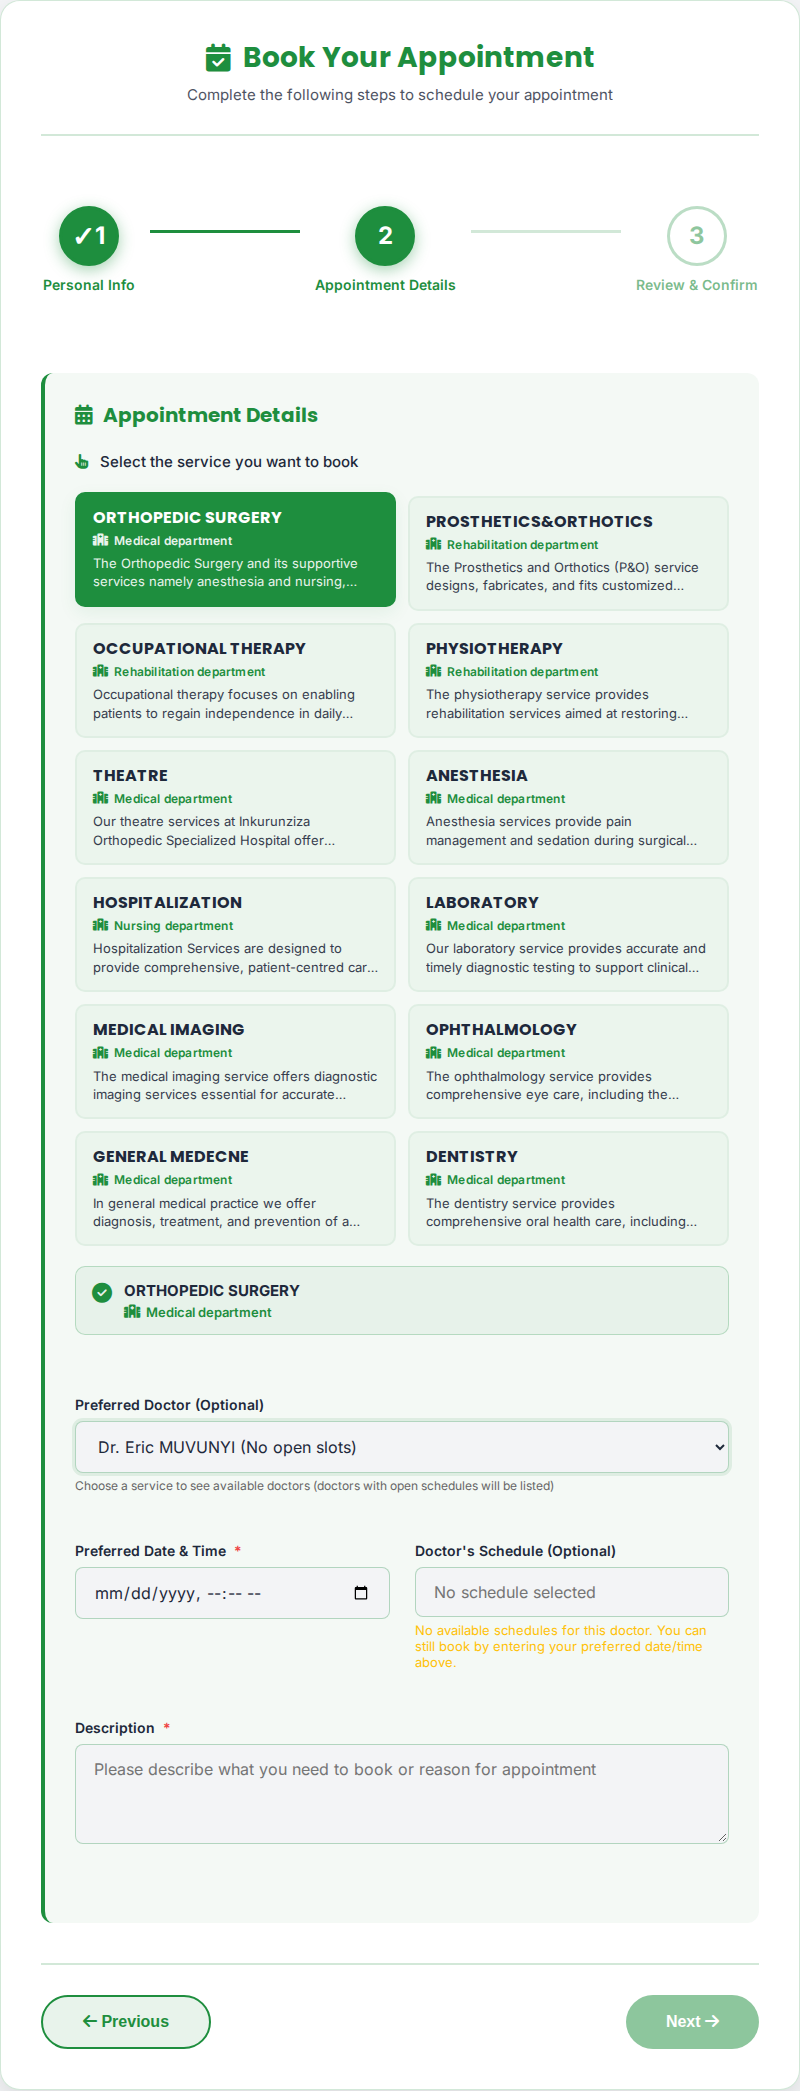
Choosing a doctor queries their real schedule. If they have open slots, a "View Slots" button appears with a calendar of bookable times. If not — as here — the form says so plainly and lets the patient type a preferred date/time instead of getting stuck.
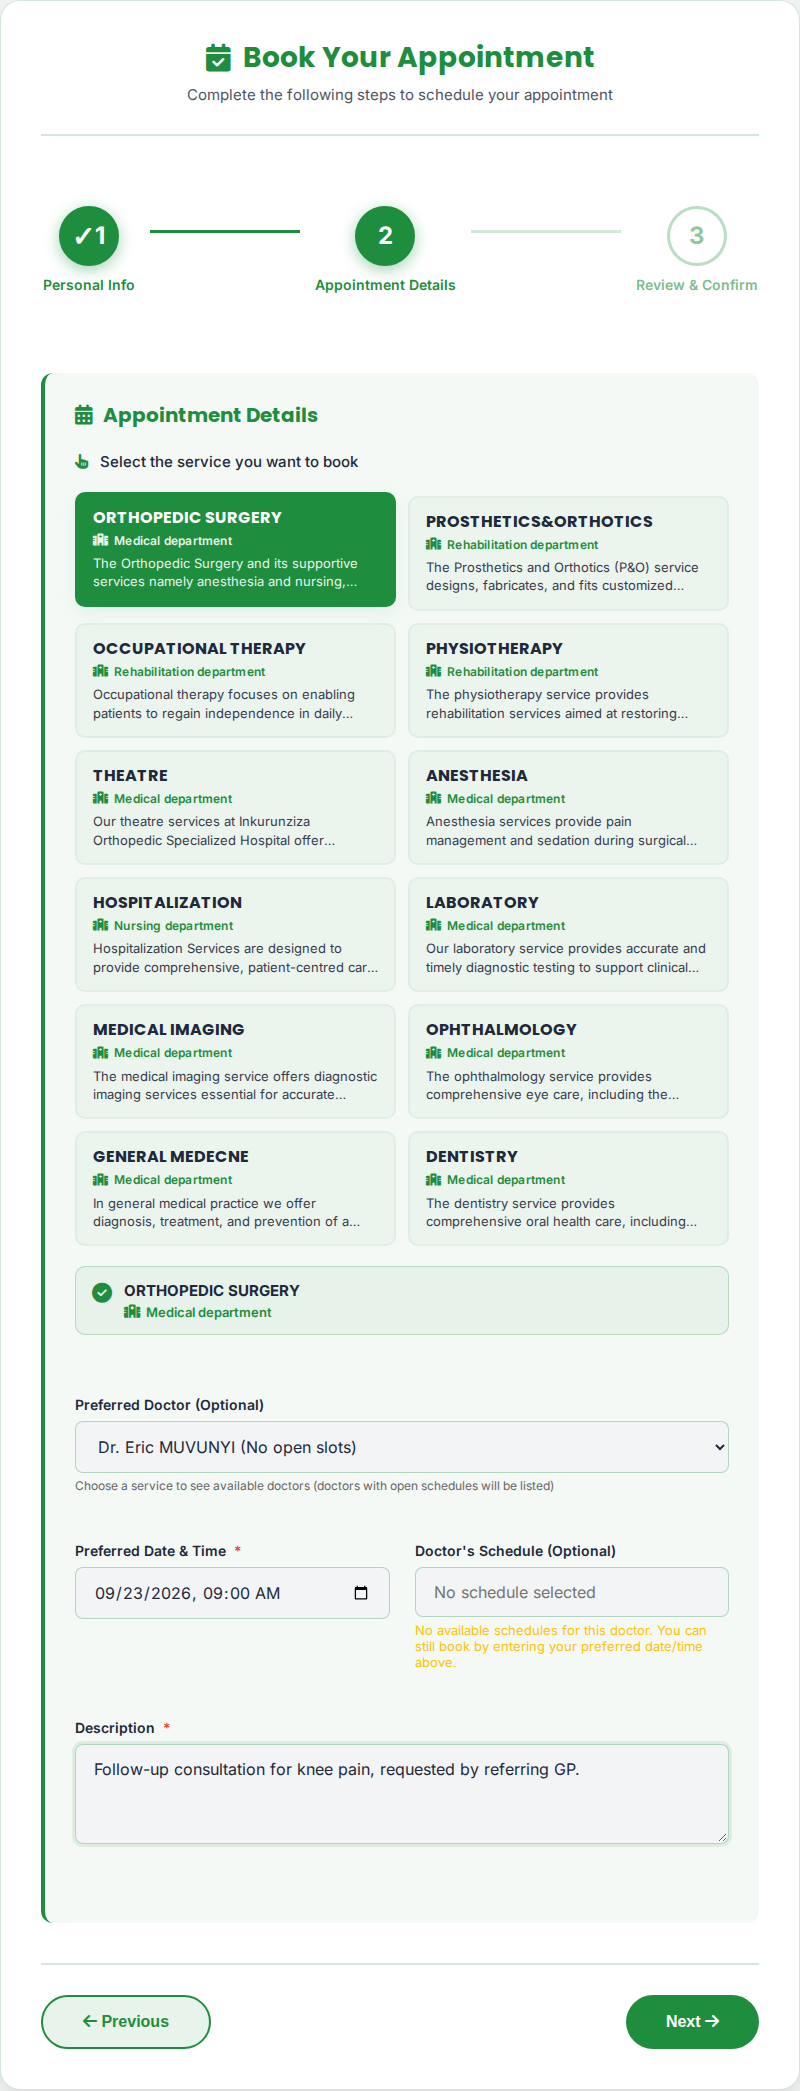
A preferred date/time and a short description of the visit reason are both required before moving on — this is what the "Next" button is waiting for.
The date & time field opens a calendar. Past days are greyed out, and days the hospital has closed are shown in red and crossed out (“Fully booked”) — they cannot be clicked. A note under the field explains this whenever closed days exist.
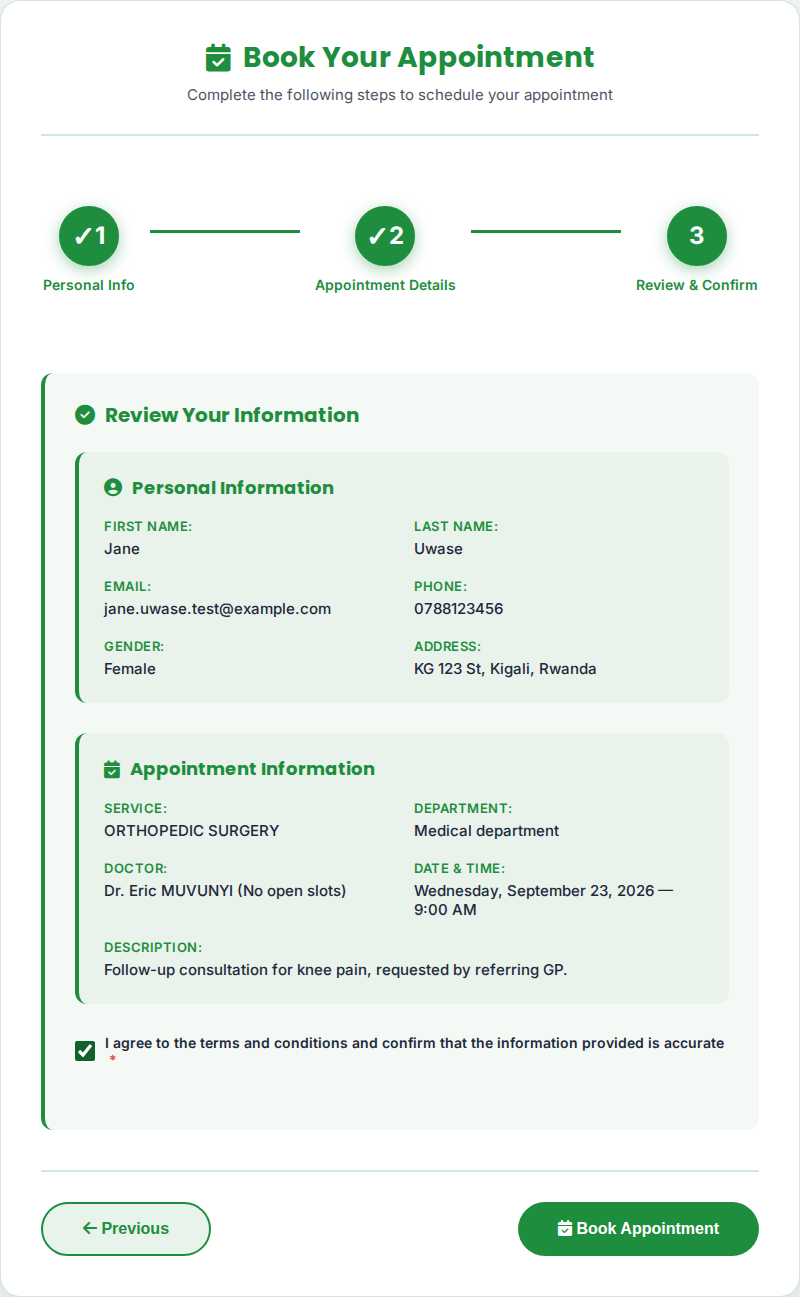
Step 3 mirrors back every answer in plain language — nothing is hidden behind IDs or codes — grouped into "Personal Information" and "Appointment Information." The patient still has to tick the terms checkbox before the final button activates.
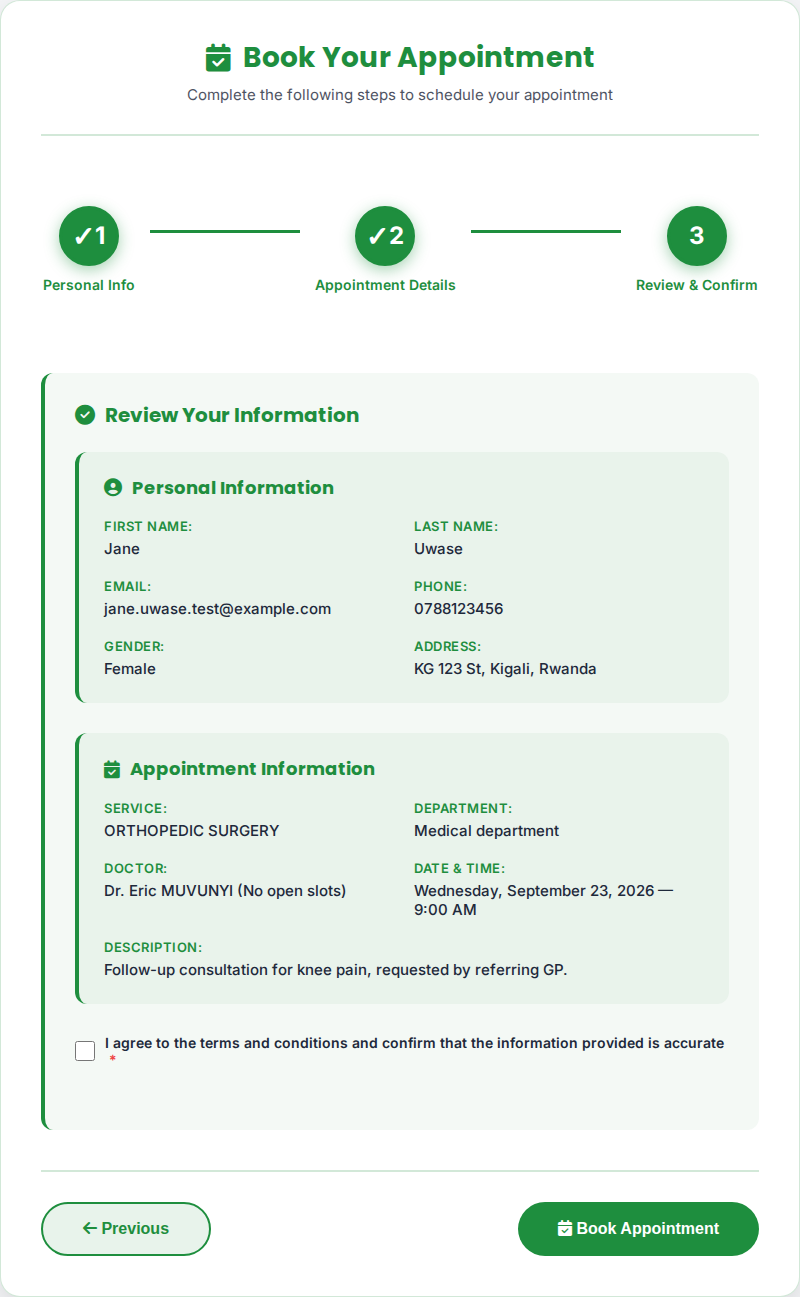
With the terms box checked, "Book Appointment" is live. Submitting posts to /appointment/submit, which validates everything again server-side, saves the appointment, and shows either a success toast or a clear, non-technical failure message.
The server checks closed days and full schedules again, so even a booking that slips past the form is refused with “Sorry, … is fully booked. Please choose another date.” If this booking fills a doctor’s schedule, that schedule closes automatically.